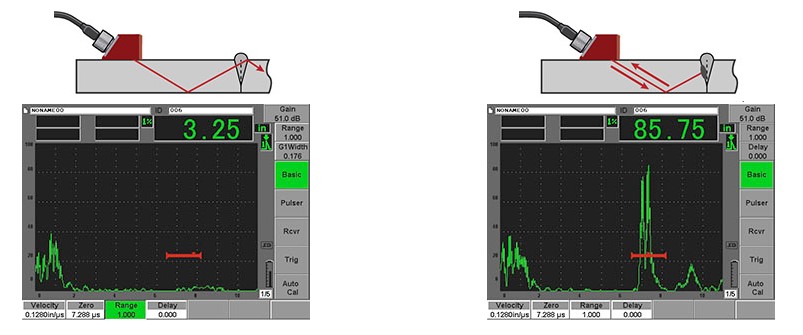
We previously discussed how straight beam ultrasonic testing (UT) can be used for inspection and thickness measurement of plates and other flat objects. Welds cannot usually be inspected with straight beam due to their rougher surface finish, so an angled beam technique known as shear wave UT is used. With shear wave, a transducer placed on the adjacent base metal sends an ultrasonic beam at an angle down into the weld. If there are no flaws in the weld, then the beam proceeds through the weld and into the opposite base metal. Any flaws in the weld will reflect the signal, which the transducer receives and the inspector sees on the equipment display. Depending on the actual part geometry, the inspector should be able to determine the approximate size, depth, and location of the flaw. More detailed flaw mapping can be performed with phased array ultrasonics (PAUT). This method uses a computer-controlled array of shear-wave transducers to send pulses at precise intervals to inspect an area. The results are faster, more accurate, and more detailed than traditional UT methods.


